
macOS 14 or later · Apple silicon and Intel
Screenshot, annotate and share – in one menu bar app
Capture, annotate, redact and share screenshots from the keyboard. Everything happens on your Mac, and data only leaves it when you ask.
- Notarized by Apple, signed with Developer ID
- Automatic updates
01 / Features
What can Screen Ninja do?
-
01
Every way to capture
Area, full screen, window, active window, timed capture (3/5/10 s), repeat the last area. Scrolling screenshots with header and footer detection.
-
02
Editor
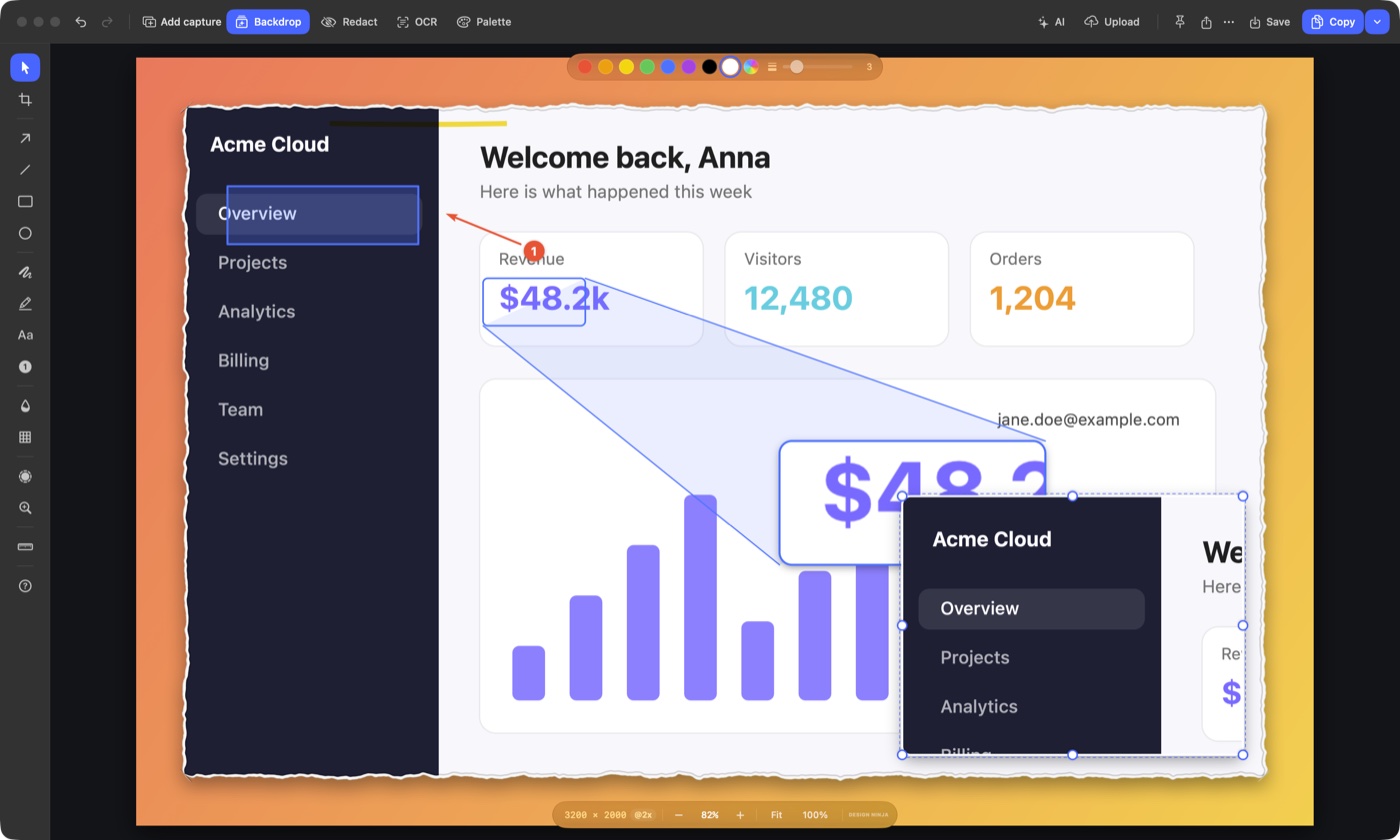
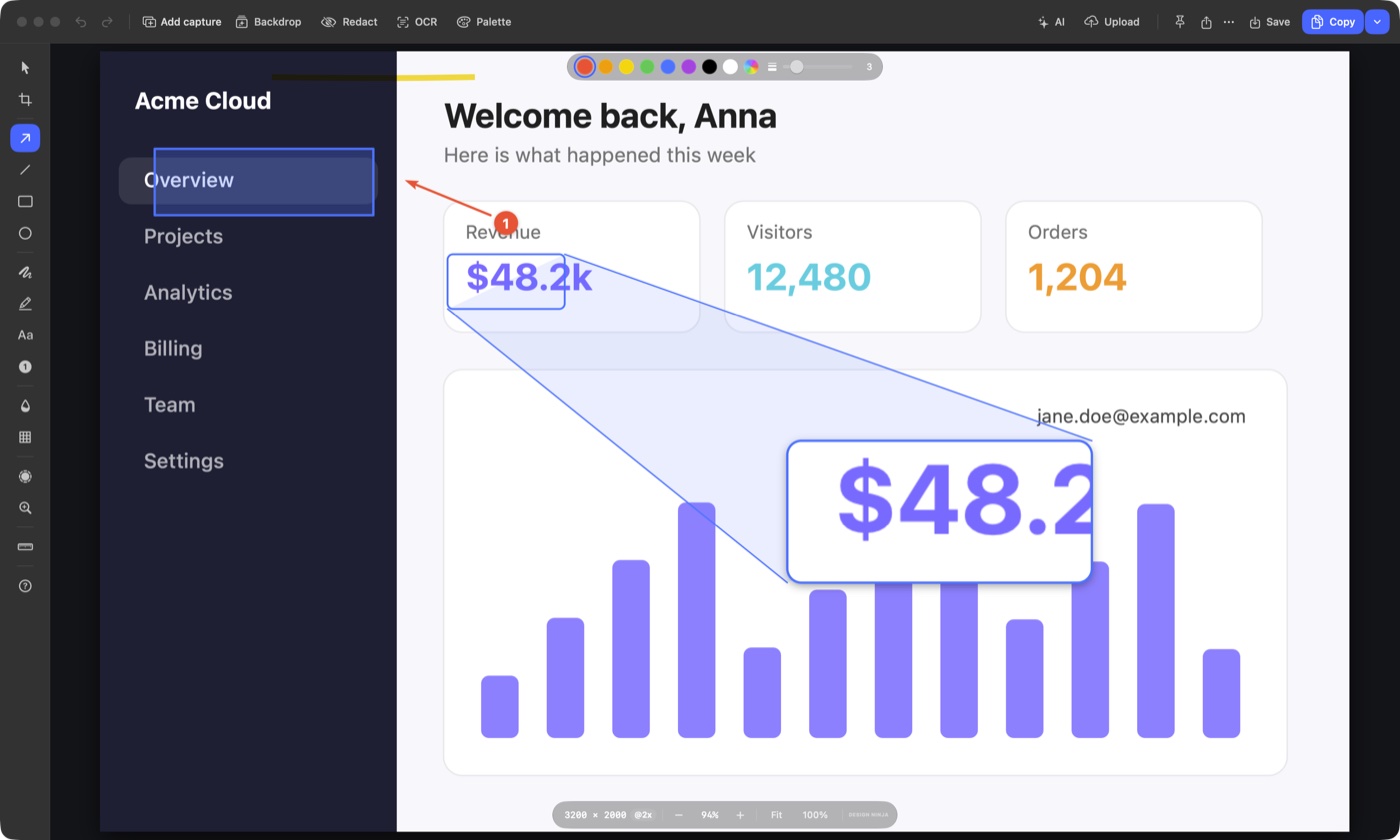
Arrow, line, rectangle, ellipse, pen, highlighter, text, numbered steps, blur, pixelate, spotlight, magnifier, ruler, crop. Undo, zoom, add another image.
-
03
Backdrops and frames
Gradient or transparent background, torn and burnt paper, polaroid, macOS window frame, shadow.
-
04
Redaction and text
Pixelate email addresses, phone numbers, card numbers, IBANs, IP addresses and tokens (check before sharing). OCR, Hungarian included, plus QR and barcode detection.
-
05
Color palette
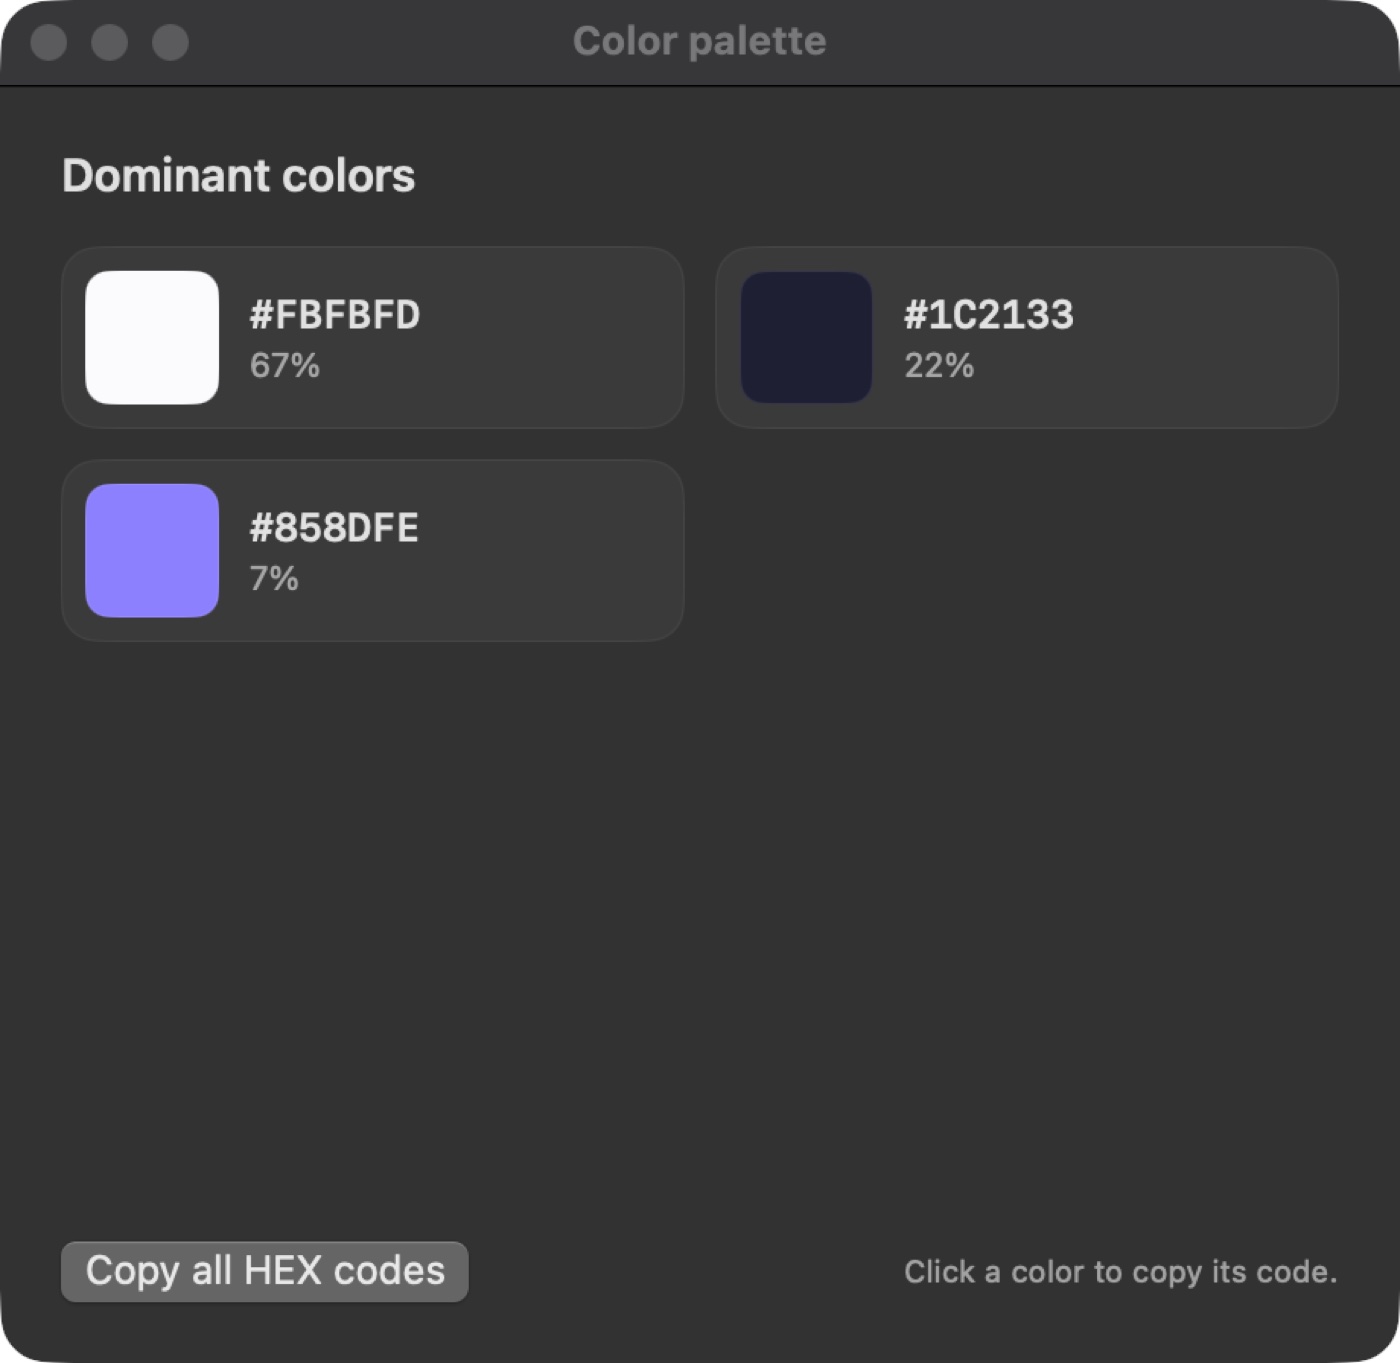
The image’s dominant colors with HEX codes, copy with one click.
-
06
Pin
The image floats above every window.
-
07
History
Full-text search (by OCR text and AI summary), starring, retention rules.
-
08
Upload to your own server
WebDAV, FTP or SFTP. The link, Markdown or HTML code goes to the clipboard. A failed upload is queued and can be retried.
-
09
AI analysis (optional)
Claude or ChatGPT with your own API key: description, UI/UX review, bugs and accessibility, text extraction, SEO text. Data is only sent when you press “Analyze”.
-
10
Three languages
Hungarian, English, German. The help shows each feature with images.
02 / In detail
In detail: Screen Ninja in pictures
The images show the Screen Ninja interface with sample data. Click any image to enlarge it.
01
Editor: mark up, explain, highlight
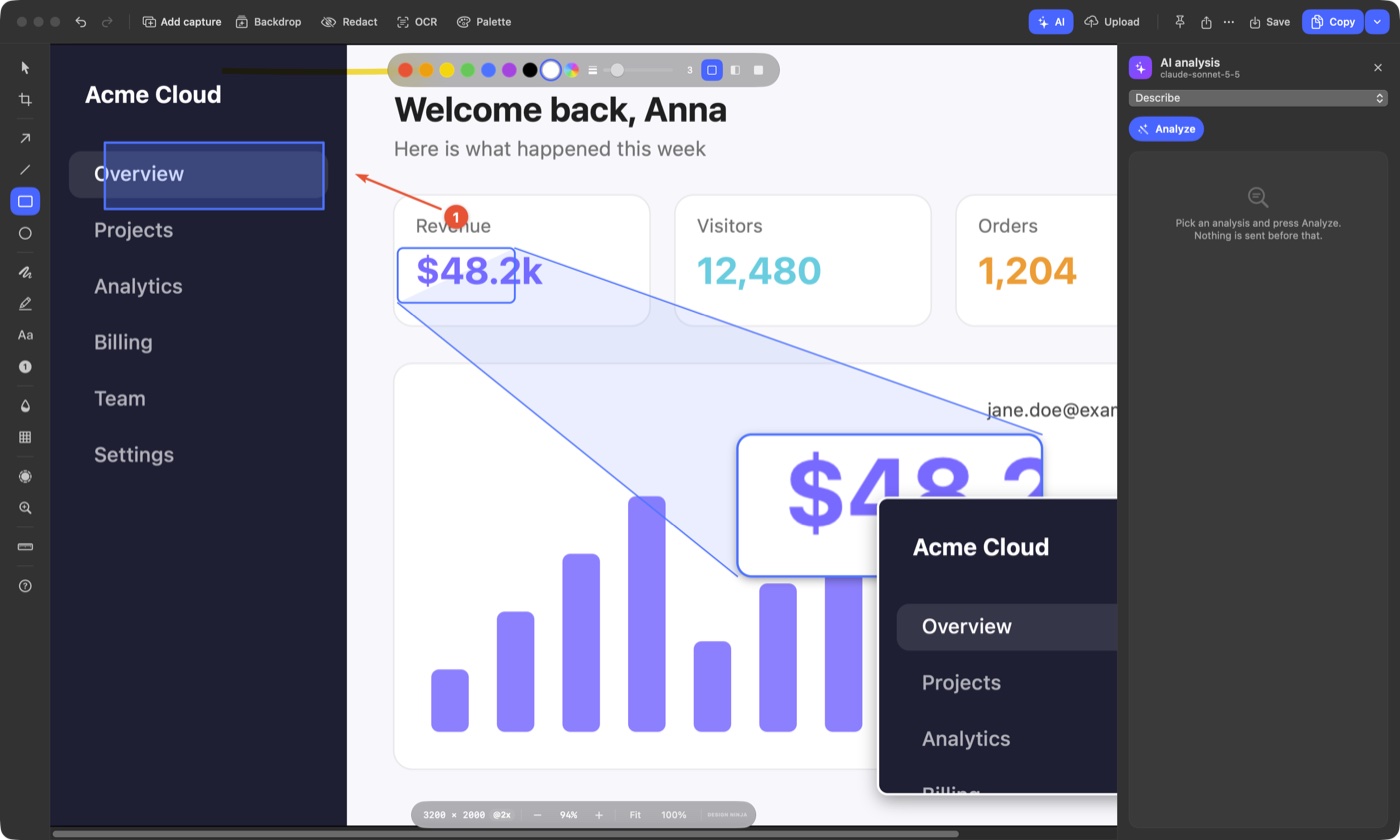
Arrow, line, rectangle, ellipse, pen, highlighter, text and numbered steps – all in one toolbar. The screenshot shows a numbered step, an arrow, a highlight and the magnifier together.
- Arrow, line, rectangle, ellipse, pen and highlighter
- Text and numbered steps
- Blur, pixelate and spotlight
- Undo, zoom, add another image
02
Magnifier, ruler and crop
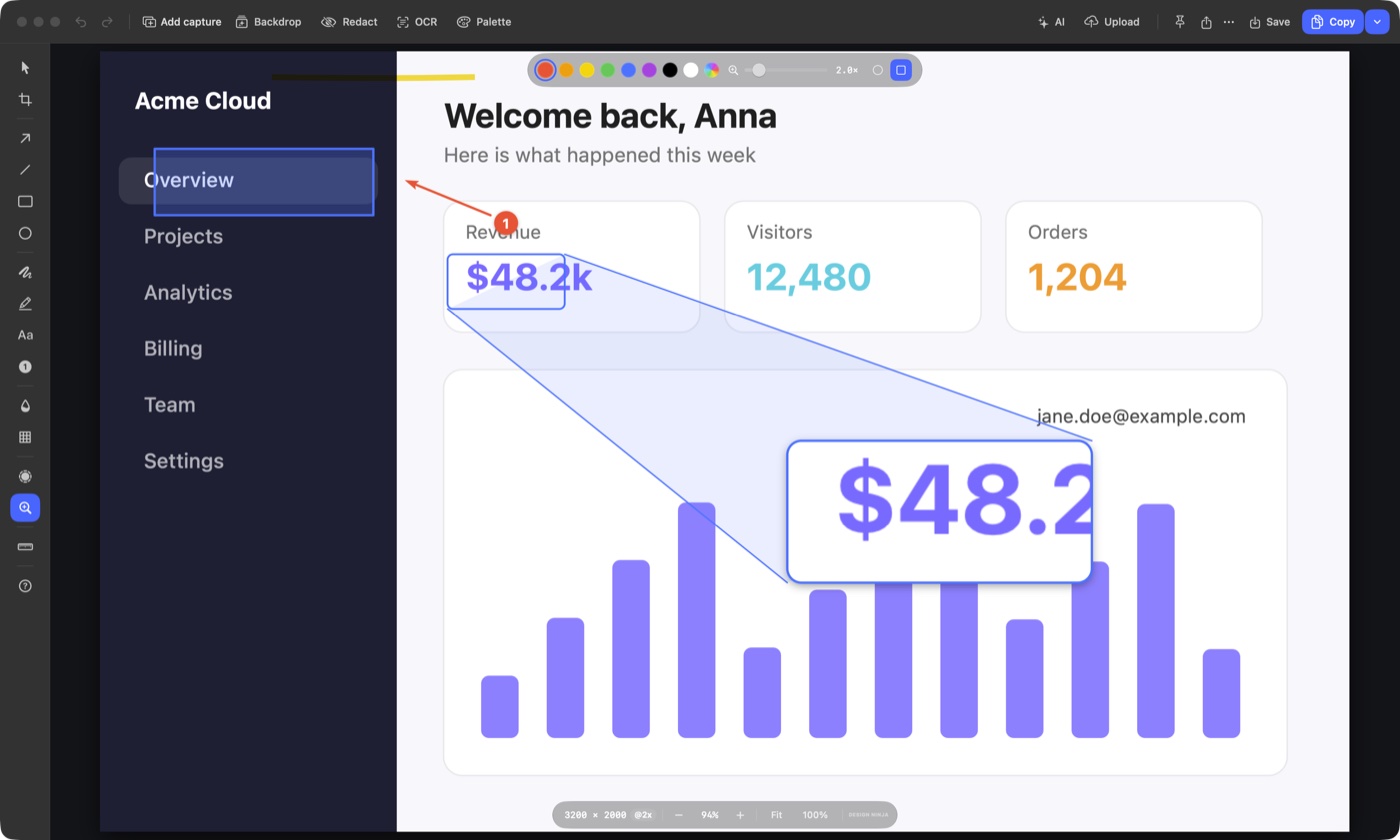
The magnifier enlarges a small detail of the image, while the ruler and crop help you measure precisely and cut the image down to what matters.
- Magnifier
- Ruler
- Crop
03
Backdrops and frames
Gradient or transparent backdrops, torn and burnt paper, polaroid, macOS window frame and shadow – turn a plain screenshot into an image that is ready to present.
- Gradient or transparent background
- Torn and burnt paper, polaroid
- macOS window frame and shadow
04
Color palette
The image’s dominant colors with HEX codes and their share. Click a color to copy its code – or copy all HEX codes at once.
- Dominant colors with percentages
- Copy with one click
- Copy all HEX codes
05
Pin
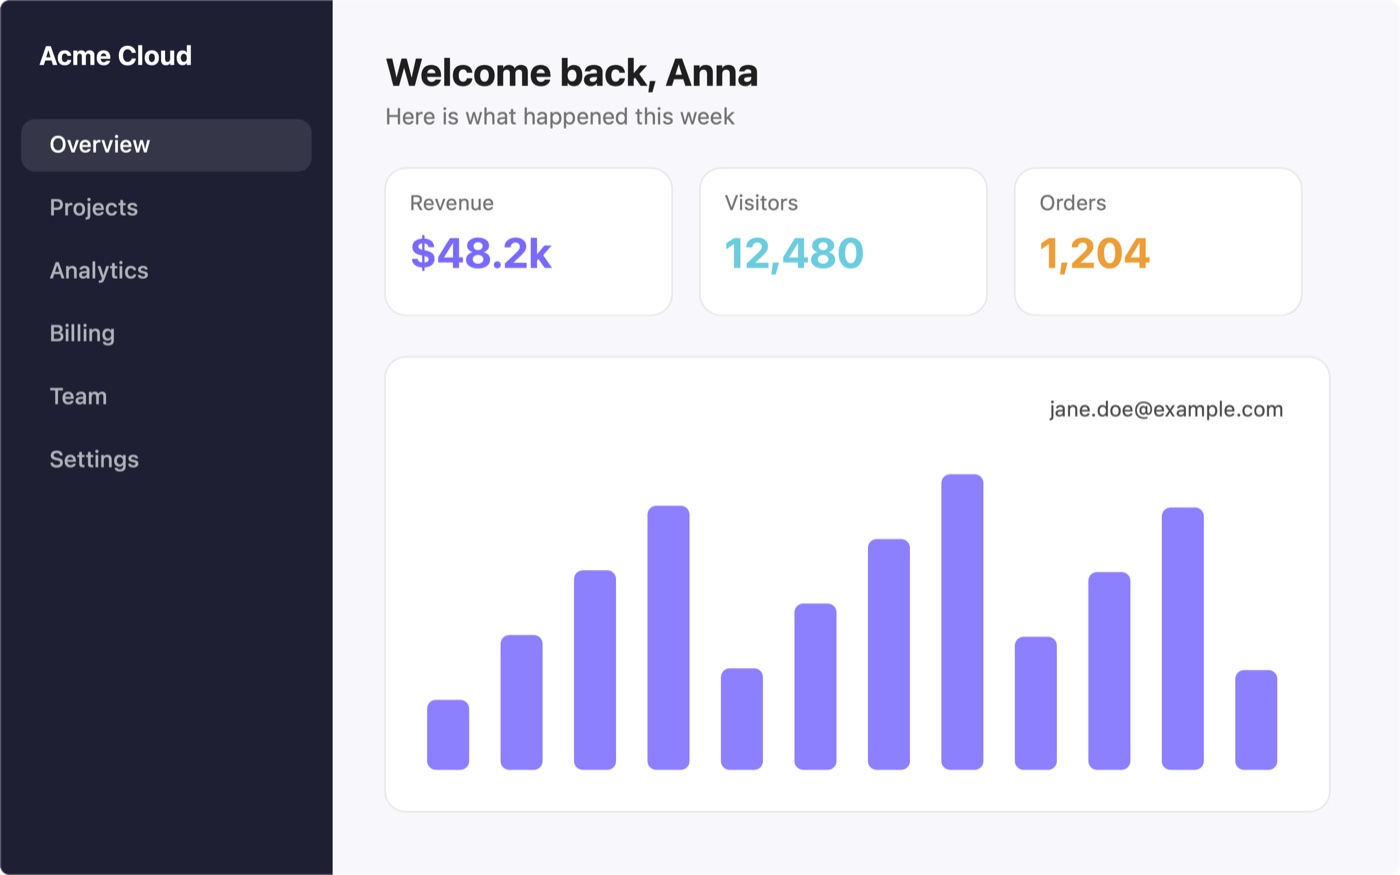
The image stays floating above every window, so it is always in view while you work.
06
History
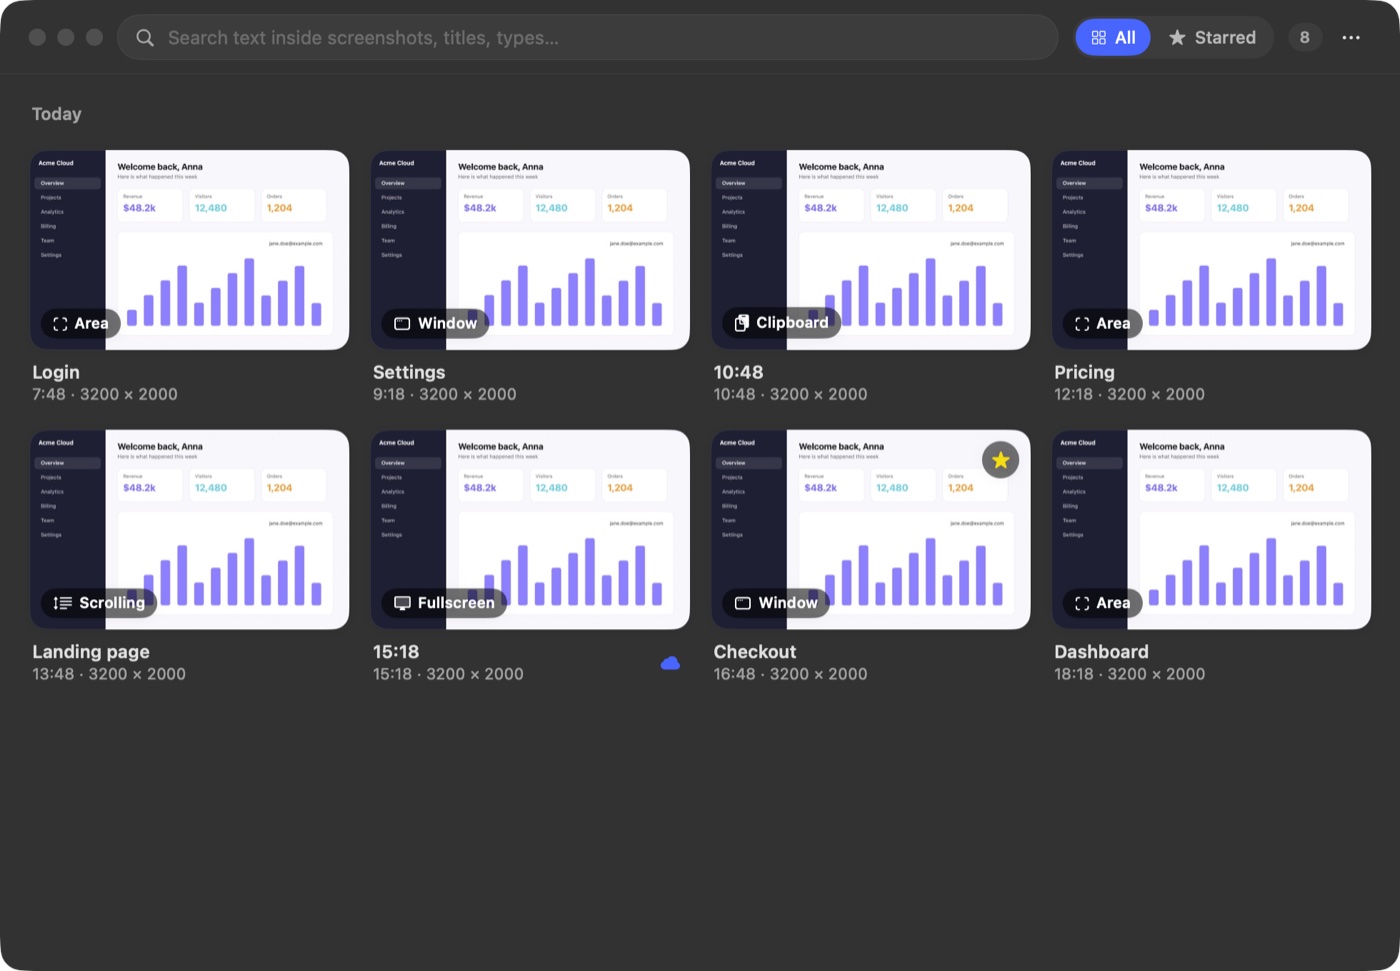
Every screenshot in one place: full-text search (by OCR text and AI summary), starring and retention rules. The cards show how each image was captured – area, window, full screen or scrolling.
- Search in OCR text and AI summaries
- Starring
- Retention rules
07
Upload to your own server
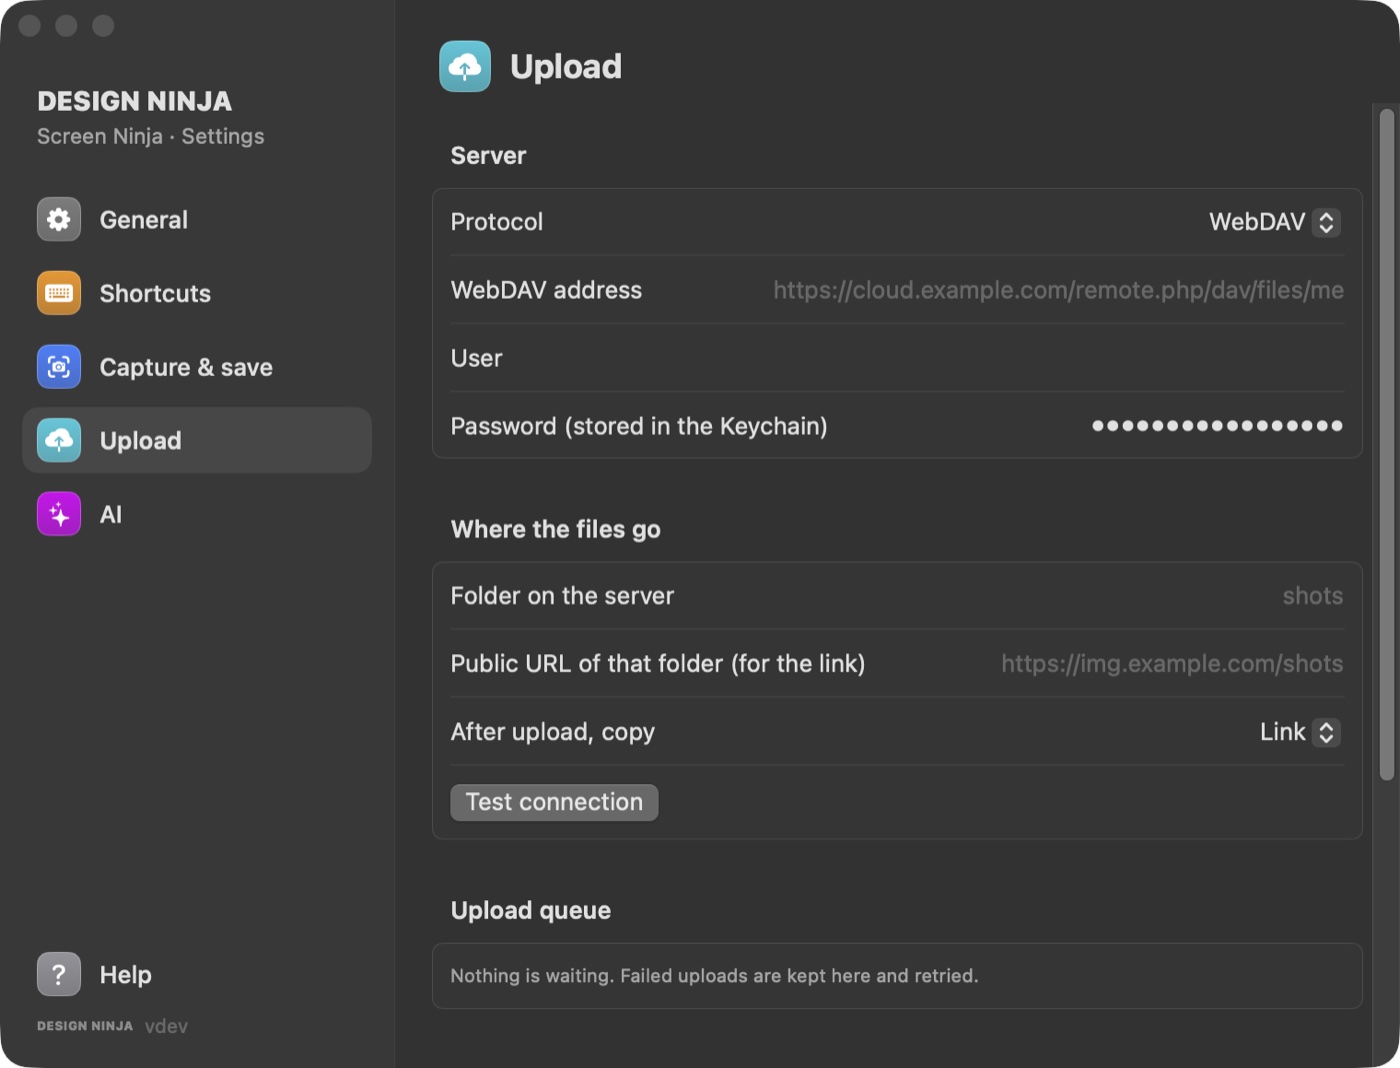
WebDAV, FTP or SFTP – passwords stay in the macOS Keychain. After uploading, the link, Markdown or HTML code goes to the clipboard; a failed upload is queued and can be retried.
- WebDAV, FTP or SFTP
- Link, Markdown or HTML code on the clipboard
- Upload queue with retry
08
AI analysis – only when you press “Analyze”
Claude or ChatGPT with your own API key: description, UI/UX review, bugs and accessibility, text extraction, SEO text. Nothing is sent until you press “Analyze”.
- Uses your own API key
- Description, UI/UX review, accessibility
- Text extraction and SEO text
03 / Privacy
Privacy – it stays on your Mac
- Screenshots, history, OCR, the color palette and redaction all happen on your Mac.
- Data leaves your Mac in two cases only, and only when you start it: to the AI provider (when you request an analysis) and to your own server (when you upload).
- Passwords and API keys are stored in the macOS Keychain.
- No account, no registration, no analytics tracking.
- The automatic update check requests the update address; the server then sees your version and your IP address.
04 / Requirements
Requirements
- macOS 14 (Sonoma) or later, Apple silicon or Intel Mac.
- Screen Recording permission (required).
- Accessibility (optional, only for automatic scrolling).
- For AI features your own API key, for uploads your own server.
05 / Installation
Installation – 3 steps
-
01
Download
Download and open the DMG.
-
02
Drag
Drag Screen Ninja into the Applications folder.
-
03
Allow
Launch it, allow it under System Settings → Privacy & Security → Screen Recording, then restart the app.
Screen Ninja 1.3.0
12.1 MB · macOS 14 or later · Apple silicon and Intel
06 / What’s new in 1.3.0
What’s new in 1.3.0
- Automatic updates, and a “Check for Updates…” menu item.
- Language switcher in the menu bar. The default language is English.
- German interface.
- Rewritten help with 15 topics, with images, in three languages.
07 / Honestly
Good to know
- Built for macOS only. There is no App Store version; you download it directly from here.
- Text recognition accuracy depends on image quality.
- AI analysis uses the charges of your own API account.
- Uploading requires your own server.
08 / FAQ
What people ask most.
macOS requires it to record the contents of the screen.
It was built for direct download. Apple has notarized it, so Gatekeeper allows the installation.
Screen Ninja is free. AI analysis uses the charges of your own API account, and uploading requires your own server.
It checks daily. Use the “Check for Updates…” menu item to check immediately.
In the folder you set under Settings → Capture & save (default: Pictures/Screen Ninja).
The current image, scaled down to 1568 pixels, and only when you press “Analyze”.
Questions about Screen Ninja?
Screen Ninja is developed by Design Ninja Agency. Write to us at info@design-ninja.agency.